WALNUT ENTRY TABLE PROJECT
By John Polly, 2020 Spring Appalachian Craft and Culture Fellow
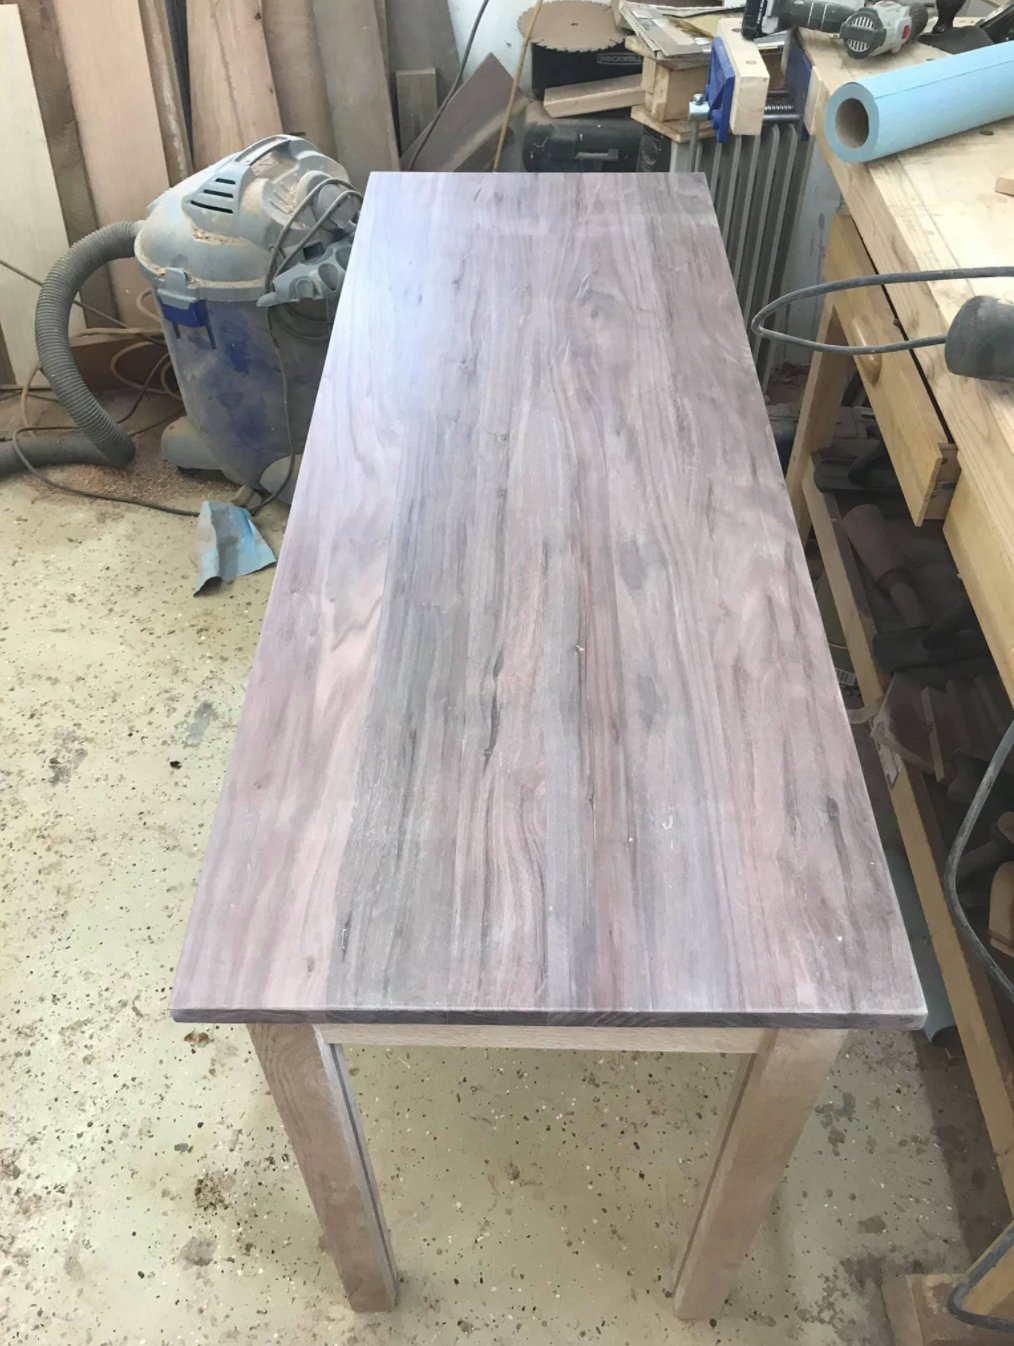
A few months ago, I had sawed up a 22-inch walnut log with a chain saw. The saw had an 18-inch bar therefore it was sawed into quarters before milling resulting in 9 to 10-inch boards with one live edge. This article details some of the steps to create a furniture piece from rough sawn lumber and incorporating hand tools for traditional joinery methods. The main piece for this table is one of those boards measuring about 4-foot x 1.25-inch x 9-inch piece of walnut with interesting grain pattern. The piece had a gently sloping curve on the sapwood side. There was a knot on one end that seemed to distract from the beauty of the overall piece. From about the center of the curve to the knot was about 16 inches and 16 inches the other way to cutoff for a 32-inch top.

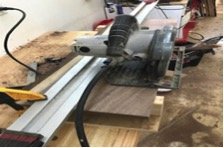
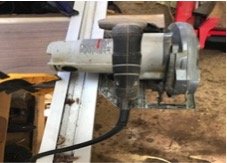
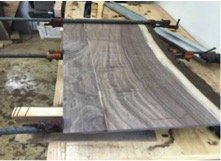
As shown in the picture neither edge of the board is straight making the use of a table saw to straighten not practical. Normally a table saw with a long fence would have been used to straighten but the shape of the board made it impractical.

Two scrap 2×4’s attached to plywood. This serves two purposes. First, it elevates the board above the bench and provides space for clamps when attaching straight edge.

When using a straight edge and skill saw to straighten boards, I recommend a set up as shown. Be sure to check that the skill saw is square with the sole. A good blade with thin kerf will result in cleaner cuts. The blade should be adjusted to barely protrude through the stock that is being cut. For better control, position the wide side of the saw against the straight edge. This arrangement means the saw motor will be over the straightedge. Be sure it is wide enough to allow for clamps. Five to six inches will work for most saws. This setup can be used as well to cut length. For narrower boards this method will require using the narrow side of the saw against the fence. The same setup can be used to make squared-off cuts as well.
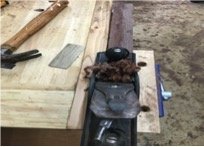
Once straightened the board was about 9 inches wide. I determined the top needed to be about 3 inches wider for a 12-inch top. A 3-inch piece was prepared the same way. Hand planes were chosen to prepare the joints for gluing. I used a #5 Stanley for the initial jointing followed by a #4 Stanley. Both were purchased used and restored. There is a tendency to roll the planes off square so take your time and check squareness frequently. When the old hand planes are restored and fine-tuned, they work as well as the expensive modern planes. Either of these planes would have been adequate to smooth the joint for gluing. They were known as the all-around planes for the average crafter. Many wood crafters years ago only had one or two hand planes, usually a number 4 or 5 which are relatively easy to find at reasonable cost. The smaller as well as the larger from that era are harder to find and cost much more to purchase.

After the boards are jointed and fit properly, apply glue and clamp for a couple of hours. The jig used for sawing is handy here because it allows the boards to be elevated and provides space for clamps underneath. It’s advisable to place clamps on both sides to help maintain flatness of the glued boards.
Here, I have removed the clamps and am beginning final finishing on the top. A #4 smoothing plane, block plane and cabinet scrapers are used for final smoothing. The varied grain patterns were challenging to reduce tear out.

Once the top was flat and smooth, radius corners are made on the front corners with wood chisels. A simple way to is to locate a round object in the shop such as a paint can or dowel rod. Mark the board back from each corner, in this case 1.25 inch. Set the round object to align with the
marks, transfer the mark to the round object and then simply align those marks on the other corners.
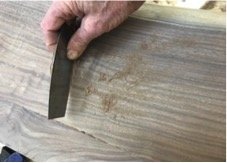
Chopping off the corners with a wood chisel produces a relatively smooth surface. Had I used a jig saw the cleanup and smoothing would have probably taken more time.
The legs for table were made by gluing two 1-inch boards. They had been sawed with circular mill years ago. This board was sawed with a circular saw mill. Note the arcs from the blade on the board.

After the glue dried, a #5 hand plane was used to clean up and resize.

A #4 hand plane was used to clean up and size to 1.5 inches.

I decided to use hanger bolts and wood corner braces to attach the legs to the tabletop with the skirt set back 1 inch and the legs at .75 inch. Take time to be extremely accurate during this process. Place the boards on a piece of carpet to elevate it above the workbench for protection. Mark the setbacks for the leg and skirt board. The skirt board can vary in width but wider is better as it is wedged against the leg to prevent racking. Notes: Accuracy of the cuts on the skirt board and corner braces must be perfectly square. When attaching the skirt to the top make the holes in the mounting brace slightly oversize and elongated to allow the top to move during seasonal fluctuations. The mounting brace needs to be shorter than the skirt to allow room for the corner brace. It is ok to glue the mounting brace to the skirt. Do not glue it to the top. Wood must be allowed to move. When mounting the skirt to the top, ensure that it mounts at a perfect right angle. Dry fitting all parts before attaching is recommended.

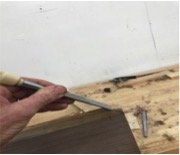
Detail of finished corner brace. Before cutting these, determine how far the hanger bolt protrudes into the space. The easiest way is to secure the lag side of the of the bolt in the leg first and then measure. The hanger bolt should be at a 45-degree angle in relationship to the corner of the leg. Flattening the inside corner of the leg about .25 inch will aid in starting the drill accurately. Use a scribe to mark a line about .25 inch from the corner both ways and flatten to lines with chisel. When drilling pilot hole for lag bolt, be careful not to drill all the way through and have a nasty hole on the outside. Here again, accuracy is important to ensure the leg will tighten equally on both sides. The drilled hole in the corner brace can be a bit oversize.

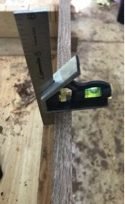
Marking corners with scribe.

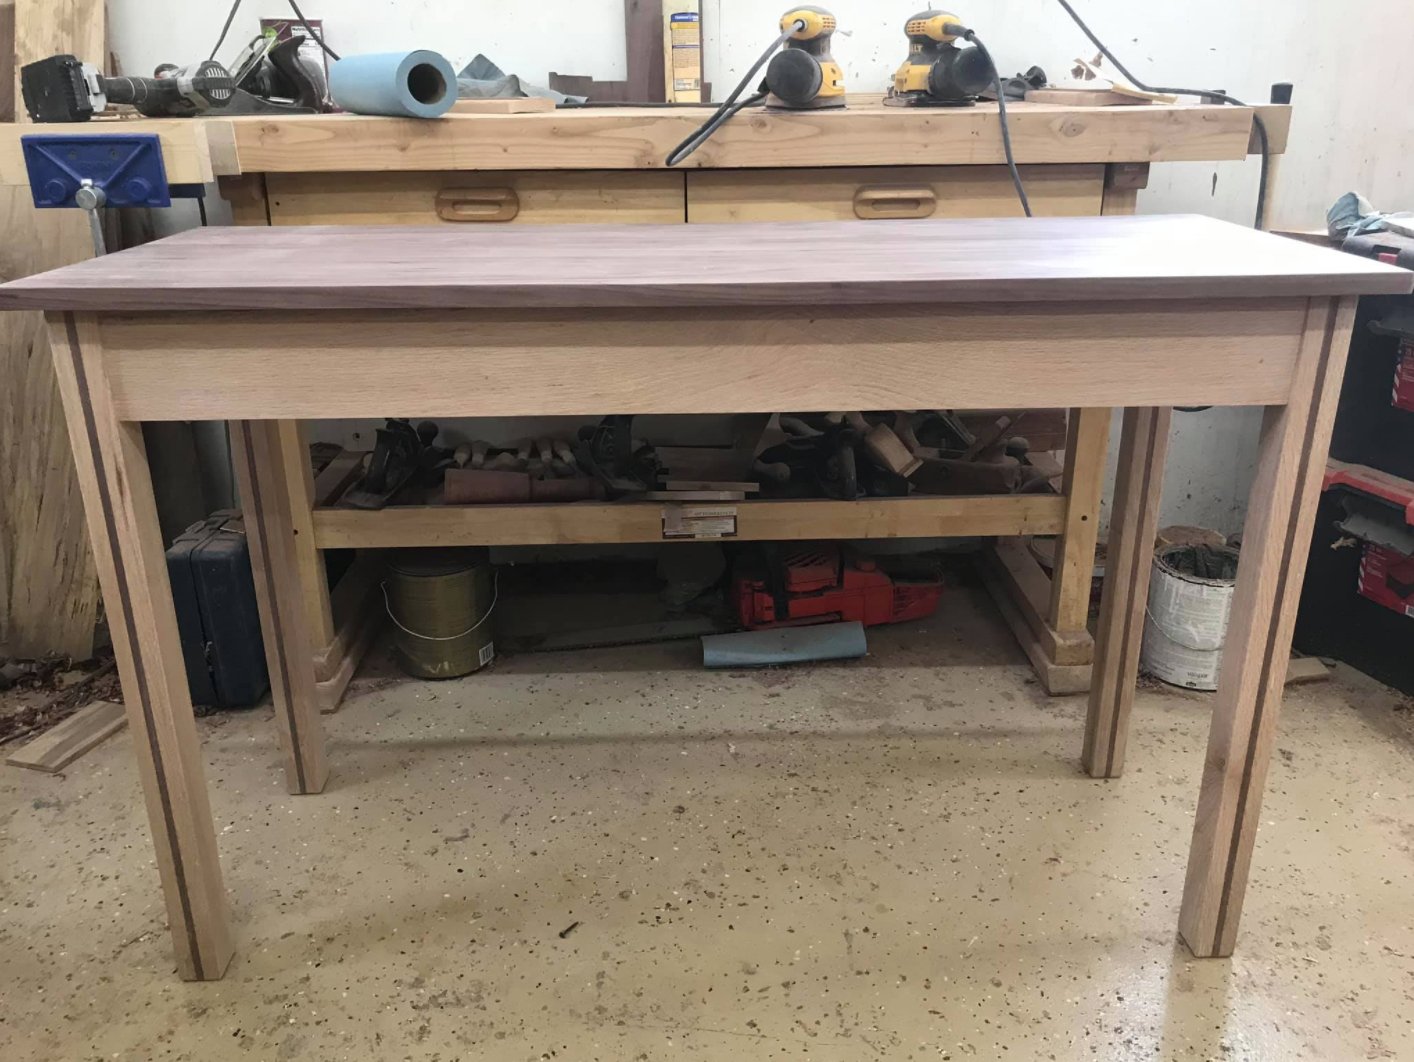
The finished table: